目次
- 1 溶接配管現場取付作業
- 2 入所教育
- 3 自社資機材持込み
- 4 配管資材荷受け
- 5 配管資材仮置き
- 6 配管資材横持ち運搬
- 7 配管サポート位置墨出し
- 8 配管サポート取付位置研磨
- 9 配管サポート取付
- 10 配管取付け
- 11 配管溶接部ピース取付
- 12 配管仮付け溶接
- 13 配管本付け溶接
- 14 配管固定
- 15 まとめ
- 16 Welding and piping on-site installation work
- 17 Inpatient Education
- 18 Bringing in company-owned equipment and materials
- 19 Receiving piping materials
- 20 Temporary storage of piping materials
- 21 Transport of piping materials horizontally
- 22 Marking the positions of pipe support
- 23 Polishing of the pipe support mounting position
- 24 Pipe support installation
- 25 Pipe installation
- 26 Installation of pipe welded joint pieces
- 27 Temporary welding of pipes
- 28 Pipe welding
- 29 Piping fixed
- 30 summary
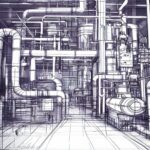
溶接配管現場取付作業
配管工事は、建築、プラント、工場などさまざまな現場で必要不可欠な作業です。特に溶接を伴う配管工事は、精密さと技術力が求められる分野です。溶接配管の現場取付作業の全工程を、初心者にもわかりやすく、かつ実際の現場目線で解説します。配管資材の荷受けから取付完了までの工程を一つずつ詳しく見ていきましょう。
入所教育
建設業における入所教育は、現場作業員が安全に業務を遂行し、各現場の基礎知識やローカルルールを教育します。事故防止、品質向上、効率的な業務遂行を主な目的としており、内容は安全教育が中心となります。建設現場は高所作業や重機操作など危険が伴うため、労働安全衛生法に基づく安全ルールや、安全帯等の保護具の正しい使用方法を指導します。過去の事故事例を紹介し、危険予知(KY)活動のルールなども説明されます。
入所教育書類は必ず保管する
-


工事現場のKYってナニ?KY活動
工事現場のKY(ケーワイ)とは? 建設業で使うKYとは、危険予知をローマ字表記(KIKEN YOCHI)を短縮した略称で ...
続きを見る
自社資機材持込み
配管工事現場への自社資機材搬入は、作業効率と安全性を確保するための重要な作業です。搬入前には現場の状況を確認し現場の広さや搬入経路を把握して、適切な工具を選定します。溶接機、グラインダー、パイプカッターなど、必要な工具をリスト化し、点検済みの状態で準備します。機材持ち込み、搬入、仮置きの際は元請け事業者と必ず打ち合わせをし許可を得た場所に搬入仮置きします。
搬入機材は事前にリスト化する
-

現場は探検しよう!
現場は情報の宝庫! お客さんからプラント配管工事の引き合い(仕事のお願い)をもらったら、ぜったい現場を探検しにいきましょ ...
続きを見る
-

現場は撮影可能?
現場写真は大切な記録 プラント配管工事現場の下見の時に、お客さんから写真撮影の許可が貰えるなら、絶対に写真を撮りましょう ...
続きを見る
-

情報はまとめよう!
整理された情報は最強 工事に関する情報は、社内で説明する必要があるので ざっくり、以下の内容が揃っていれば大丈夫です。 ...
続きを見る
-
プラント配管 現場調査、図面スケッチの重要性
フロアレベルと図面のFL寸法が全く違う 既存の建屋において、機器の入れ替えに伴う配管等の撤去、改造、新設を ...
続きを見る
配管資材荷受け
配管現場取付工事の最初の作業は、工場で製作された配管ピースや部品の荷受けです。トラックで運ばれてくる配管資材(加工済み配管、予備材料、継手、フランジ、バルブ、ガスケット、ボルトなど)を確認し、受け入れる作業です。荷受け作業では、納品書や出荷記録書と照らし合わせて品目や数量、仕様を確認し、傷や変形がないかを点検します。不備があれば速やかに報告し対応を協議します。このプロセスは、工事の品質とスケジュールを左右する重要なステップです。資材の誤りや不足は、現場での作業遅延やコスト増につながるため細心の注意が必要です。安全面も重視し、重量物の移動にはフォークリフトやクレーンを使用し、作業員の安全を確保します。
資材受入れ確認は必須工程
配管資材仮置き
荷受けした資材はすぐに使用するわけではなく、仮置き場所に整理して保管します。仮置き場所は作業エリアに近く、かつ他の作業の邪魔にならない場所を選びます。資材は床への直置きを禁止している事業者が多いので角材は必ず準備しておきます。工場製作した配管はライン別・フロア別に仕分けをして保管します。ラベル、マーキング、仮置きマップを活用すると、後で探す手間が省けます。
仮置き場所が屋外の場合は風雨から資材を守るため、シートをかける場合もあります。ステンレス鋼は異材接触によるサビ防止のため仮置き場所を分ける必要があります。仮置きが適切に行われると横持ち運搬がスムーズに進みます。逆に、無秩序な仮置きは作業遅延や資材紛失の原因となるため、計画的な管理が欠かせません。
仮置き場所は事前に打ち合わせ
配管資材横持ち運搬
仮置きした資材を実際の取付場所まで運ぶのが、横持ち運搬です。この作業では効率と安全を両立させることが求められます。小型の資材は手作業で運ぶこともありますが、大型のパイプや重い資材は台車、クレーン、チェーンブロックを使用します。運搬ルートに障害物がないか事前に確認します。資材の落下や衝突を防ぐため、運搬中は周囲に注意を促す声掛けを行います。横持ち運搬は体力仕事の一面もありますが、効率的な計画とチームワークで作業者の負担を軽減できます。
手持ち運搬は出来るだけ避ける
配管サポート位置墨出し
配管を固定するためのサポート(支持金具)の位置を決めるのが、墨出し作業です。配管を正確な位置に取り付けるには不可欠な作業です。設計図や配管図に基づき、サポートの設置位置を把握します。レーザー墨出し器やメジャーを使用して、壁や床にサポートの取付位置を正確にマーキングします。墨出しの精度は、後工程のサポート取付や配管設置の品質に直結します。ミスを防ぐため、複数人でダブルチェック(元請け立会い)を行うのが一般的です。
逃げ墨の忘れが無いか確認する
配管サポート取付位置研磨
サポートを設置する前に、取付位置の表面を研磨(磨き作業)します。鋼材の表面に錆、汚れ、塗装が残っている場合は、グラインダーやワイヤーブラシで除去します。研磨後の粉塵やゴミをブロワーやブラシで取り除きます。研磨作業は地味ですが、サポートの耐久性に大きく影響します。特にプラントのような高負荷環境では、この工程で手抜きをすると後で大きな問題につながる可能性があります。
研磨場所の間違いに注意する
配管サポート取付
サポート取付が完了すると、配管本体の設置が可能になります。この段階でサポートの位置に問題があると、配管全体の品質が損なわれるため、慎重な作業が求められます。
配管取付け
配管本体を設置する工程です。この作業では、仮置き場所から運んだパイプをサポートに固定し、配管ルートを構築します。設計図に基づき、パイプをサポート上に配置します。長いパイプはクレーンやチェーンブロックで吊り上げて設置します。パイプが動かないよう、クランプや仮のボルトでサポートに固定します。この時点では、微調整が可能な状態にしておきます。パイプ同士や継手、フランジとの接続部分をチェックし、溶接やボルト締めのための準備をします。現場の全体像が見えてくる段階です。作業員同士の連携が重要で、特に大型配管では安全管理を徹底する必要があります。
水平や勾配の指定は必ず確認
配管溶接部ピース取付
配管同士を溶接でつなぐ前に、溶接部にピース(小さな板材)を仮付けします。この工程は、溶接の準備段階として重要です。配管の材質や厚さに合ったピースを選びます。ピースをパイプに溶接で固定します。この時点で、ルート間隔や芯ズレがないか確認します。ピース取付は、溶接の品質を左右する重要な工程です。丁寧な準備が、後の溶接作業の成功につながります。
配管仮付け溶接
パイプや継手を本格的に溶接する前に、仮付け溶接を行います。この工程は、配管の位置を固定し、ズレを防ぐために行われます。仮付け溶接は、本付け溶接の成功を左右する重要なステップです。配管工の技術力が問われる場面でもあります。
配管本付け溶接
仮付けが完了したら、本付け溶接で配管を完全に接合します。この工程は、配管の強度と設計した性能を確保するために最も重要な作業です。設計図や規格に基づき、溶接ビードを丁寧に重ねていきます。溶接後は、目視検査や非破壊検査(X線、超音波など)で溶接部の品質を確認します。本付け溶接は、配管工事の仕上がりを決定する工程です。熟練した溶接工が担当し、厳しい品質管理のもとで進められます。
配管固定
最後に配管をサポートにしっかりと固定するために、UボルトやUバンドを用いて締付けます。配管がしっかりと固定されているか、振動や荷重で緩まないかを確認します。必要に応じて、緩み止めナットを使用します。UボルトやUバンドの締付けが完了すると、配管工事の主要な工程は終了です。この後、圧力試験やリークテストを行い、配管システムの完成度を最終確認します。
まとめ
溶接配管の現場取付作業は、荷受けから締付けまで、多くの工程が連鎖的に繋がっています。各工程で求められるのは、正確さ、安全性、そしてチームワークです。初心者の方は、まずは荷受けや仮置きなどの基本的な作業から学び、徐々に墨出しや溶接などの専門的な技術を身につけていくと良いでしょう。また、現場では想定外のトラブル(資材の不足、天候の影響、設計変更など)が発生することもあります。柔軟な対応力と事前の準備が成功の鍵となります。
Welding and piping on-site installation work
Piping work is an essential task in various fields such as buildings, plants, and factories. Piping work involving welding, in particular, demands precision and technical skill. This guide explains the entire process of on-site welded piping installation in a way that is easy for beginners to understand, and from the perspective of actual on-site work. Let's take a detailed look at each step, from receiving the piping materials to the completion of the installation.
Inpatient Education
In the construction industry, onboarding training aims to ensure that site workers perform their duties safely and to educate them on the basic knowledge and local rules of each site. The main objectives are accident prevention, quality improvement, and efficient work execution, and the content focuses primarily on safety education. Because construction sites involve risks such as working at heights and operating heavy machinery, training covers safety rules based on the Industrial Safety and Health Act, as well as the correct use of protective equipment such as safety harnesses. Past accident cases are presented, and rules for hazard prediction (KY) activities are also explained.
Be sure to keep all admission education documents.
Bringing in company-owned equipment and materials
Bringing our own equipment and materials to a piping construction site is a crucial task for ensuring work efficiency and safety. Before delivery, we check the site conditions, understand the size of the site and the delivery route, and select the appropriate tools. We create a list of necessary tools, such as welding machines, grinders, and pipe cutters, and prepare them after inspection. When bringing in, delivering, or temporarily storing equipment, we always consult with the general contractor and deliver and temporarily store the equipment in a location that is permitted.
The equipment to be brought in should be listed in advance.
Receiving piping materials
The first task in on-site piping installation is receiving the piping pieces and components manufactured at the factory. This involves checking and accepting the piping materials (processed pipes, spare materials, fittings, flanges, valves, gaskets, bolts, etc.) delivered by truck. During the receiving process, the items, quantities, and specifications are checked against the delivery slips and shipping records, and they are inspected for damage or deformation. Any deficiencies are reported immediately, and a solution is discussed. This process is a crucial step that affects the quality and schedule of the work. Incorrect or insufficient materials can lead to delays and increased costs on-site, so utmost care is required. Safety is also a priority, and forklifts and cranes are used to move heavy objects to ensure the safety of the workers.
Material acceptance verification is a mandatory process.
Temporary storage of piping materials
The materials received are not used immediately; they are organized and stored in a temporary storage area. The temporary storage area should be close to the work area and not interfere with other work. Many contractors prohibit placing materials directly on the floor, so wooden blocks should always be prepared. Piping manufactured at the factory is sorted and stored by line and floor. Using labels, markings, and temporary storage maps will save time searching later.
If the temporary storage area is outdoors, a sheet may be used to protect the materials from wind and rain. Stainless steel needs to be stored in a separate temporary storage area to prevent rust caused by contact with other materials. Proper temporary storage ensures smooth transportation. Conversely, disorganized temporary storage can cause work delays and material loss, so planned management is essential.
The temporary storage location will be decided in advance.
Transport of piping materials horizontally
Horizontal transport involves moving materials that have been temporarily placed to their actual installation location. This work requires both efficiency and safety. Small materials may be moved by hand, but large pipes and heavy materials are transported using dollies, cranes, and chain blocks. Obstacles in the transport route are checked in advance. To prevent materials from falling or colliding, warnings are given to those around during transport. Horizontal transport can be physically demanding, but the burden on workers can be reduced with efficient planning and teamwork.
Avoid carrying items by hand as much as possible.
Marking the positions of pipe support
Marking out involves determining the positions of supports (support brackets) for securing pipes. This is an essential step for installing pipes in the correct locations. Based on design drawings and piping diagrams, the support installation locations are determined. Laser levels and measuring tapes are used to accurately mark the support installation positions on walls and floors. The accuracy of the marking out directly impacts the quality of subsequent support installation and pipe installation. To prevent errors, it is common practice to have multiple people double-check the work (with the general contractor present).
Check to make sure you haven't forgotten any escape ink.
Polishing of the pipe support mounting position
Before installing the support, the mounting surface is polished. If there is any rust, dirt, or paint remaining on the steel surface, it is removed with a grinder or wire brush. After polishing, dust and debris are removed with a blower or brush. Polishing is a simple task, but it greatly affects the durability of the support. In high-load environments such as plants, cutting corners in this process can lead to major problems later on.
Be careful not to polish in the wrong place.
Pipe support installation
Once the support is installed, the main piping can be installed. At this stage, if there are any problems with the support's position, the quality of the entire piping system will be compromised, so careful work is required.
Pipe installation
This is the process of installing the main piping system. In this work, pipes transported from the temporary storage area are fixed to supports, and the piping route is constructed. The pipes are placed on the supports according to the design drawings. Long pipes are lifted and installed using cranes or chain blocks. The pipes are secured to the supports with clamps and temporary bolts to prevent them from moving. At this stage, the system is left in a state where fine adjustments can be made. Connections between pipes, fittings, and flanges are checked, and preparations are made for welding and bolting. This is the stage where the overall picture of the site becomes clear. Coordination among workers is important, and safety management must be thorough, especially with large-scale piping.
Always check the specifications for horizontal and slope.
Installation of pipe welded joint pieces
Before welding pipes together, tack pieces (small metal plates) are attached to the weld area. This step is an important preparatory step for welding. Pieces are selected to match the material and thickness of the pipes. The pieces are then welded to the pipes. At this point, check for any misalignment or misalignment of the roots. Piece attachment is a crucial step that affects the quality of the weld. Careful preparation leads to the success of the subsequent welding work.
Temporary welding of pipes
Before permanently welding pipes and fittings, tack welding is performed. This process fixes the position of the piping and prevents shifting. Tack welding is a crucial step that can determine the success of the final welding, and it is also a test of the pipefitter's skill.
Pipe welding
Once tack welding is complete, the pipes are permanently joined with final welding. This is the most crucial step in ensuring the strength and performance of the pipes as designed. The weld beads are carefully overlapped according to the design drawings and specifications. After welding, the quality of the weld is checked through visual inspection and non-destructive testing (X-ray, ultrasonic, etc.). Final welding is the step that determines the final finish of the piping work. It is handled by skilled welders and carried out under strict quality control.
Piping fixed
Finally, U-bolts or U-bands are used to securely fasten the piping to the supports. It is then checked that the piping is securely fixed and will not loosen due to vibration or load. Locking nuts are used as needed. Once the U-bolts and U-bands are tightened, the main stages of the piping work are complete. After this, pressure tests and leak tests are performed to finalize the completeness of the piping system.
summary
On-site installation of welded pipes involves a series of interconnected steps, from receiving materials to tightening. Accuracy, safety, and teamwork are essential at each stage. Beginners should start by learning basic tasks such as receiving and temporarily placing materials, and gradually acquire more specialized skills such as marking out and welding. Unexpected problems can also occur on-site (such as material shortages, weather conditions, or design changes). Flexibility and thorough preparation are key to success.